Introduction
In our first tutorial we made a domain with Powershell with the GUI installed. Now it is time to add a secondary domain controller in our domain. This time we will do something different because we won't be using the GUI. We just want to use the server core installation because we can beautifully manage our server core installation later on our first domain controller.Steps
 |
| Make sure you select the "Server Core Installation" |
 |
| Once the installation is done and you have set the local password you should get this screen. |
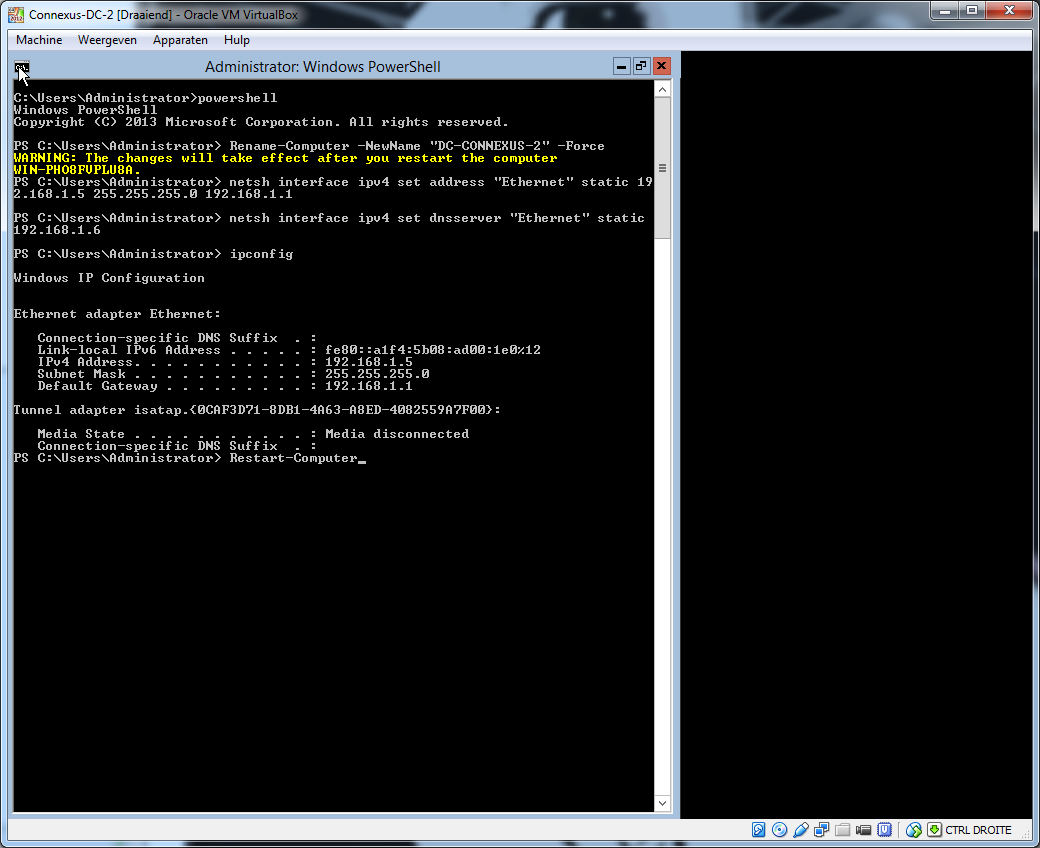 |
| Rename the computer and set a static IP address. |
 |
| Just to be sure ping the first domain controller (in the previous tutorial I gave DC1 IP address 192.168.1.6). If the ping is an success we can proceed. |
 |
| After you entered the asked items answer with "Y". |


 |
| Now you have a second domain controller for redundancy! |
Scripts
Preparations
#Rename the computer
Rename-Computer -NewName "DC-CONNEXUS-2" -Force
#Change to static IP address
netsh interface ipv4 set address “Ethernet” static 192.168.1.5 255.255.255.0 192.168.1.1
netsh interface ipv4 set dnsserver “Ethernet” static 192.168.1.5
#Reboot the computer to make sure the name has changed
Restart-Computer
Join the domain
#Add domain services
Add-WindowsFeature AD-Domain-Services
#Join a existing domain as domain controller
Install-ADDSDomainController -InstallDns -Credential (Get-Credential) -DomainName (Read-Host "Domain to promote into")
0 reacties:
Post a Comment
Note: Only a member of this blog may post a comment.